Many people scan their old photos to preserve them and to share them by e-mail and CD.
One mistake they make is they use the default settings of their scanning software.
This gives low resolution and
poor quality images.
During the pre-scan view you should use the contrast, brightness, and color adjustment settings
to get the best possible image. Change the dpi setting to at least 300 dpi (dots per square inch) and make the final scan of
the image around 12 inches at the widest/longest point. Even if the actual picture is much smaller it is better to increase
the final output size.
The best quality format is TIFF but if you use at least the minimum suggestions above a JPG
image will make fine prints and look good on a computer screen.
TIFF format files will be very large and take up a lot of hard disk space.
Below the first example shows a picture that was scanned at 100 dpi and the other at 300 dpi. The contrast and brightness
settings were also not corrected with the first image which gives a washed out look.
 Low resolution above - high resolution below
Notice you can see the hair on the fur of the higher res image and the
texture of the coat but the low res image is blurry. You can almost make out the thread that holds the bottom button on
the coat of the high res image but the low res image shows only a blurry button.

The next two images show the full view of the low and high resolution scans from above.
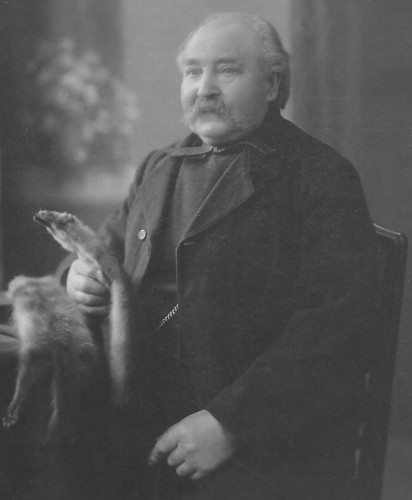 Image above using the default scanner settings.
Below - adjustments made during the pre-scan to get the best possible
view.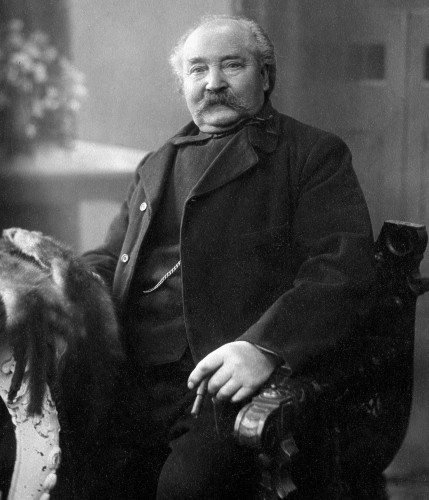
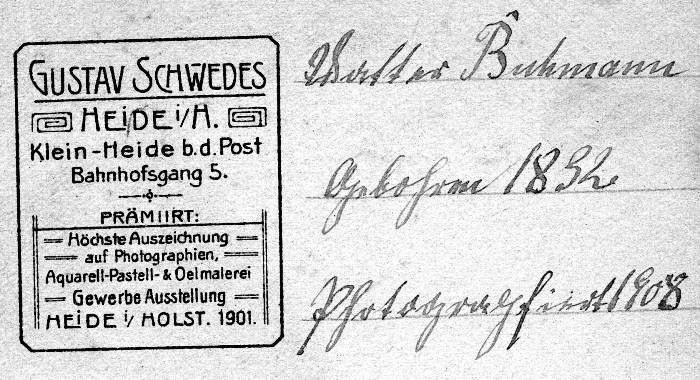
Below is a scan of the back side of the picture shown above. The picture was taken in Heide, Holstein, Germany.
The last name is clearly Buhmann on the first line. The second one could be the birth year and the last line
appears to be the year the picture was taken.